In this article, we'll cover:
- Steps to download fire data for your monitored area.
- How to adjust filters and select data formats for export.
Accessing data from your monitored area in the Wildfire Solution provides valuable insights into wildfire activity, including location, intensity, and progression within your specified area of interest.
Steps to Download Data
1. Select Your Monitored Area
Begin by viewing your area of interest on the main screen and clicking on its outline.

2. Access the Export Menu
Once the monitored area is selected, go to the “Monitor” menu and select the Export Data option.
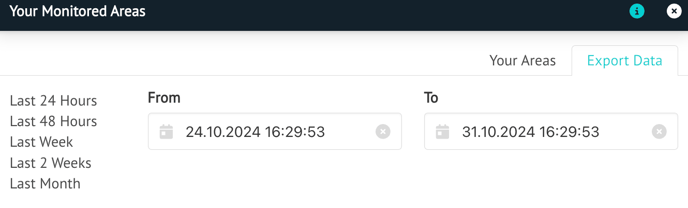
3. Set Your Timeframe
In the Export Data menu, specify a timeframe for the data you wish to download.
- Recommendation: For optimal performance, select timeframes of three months or shorter.
- Quick selection options on the left provide shortcuts for common timeframes.
4. Choose Data Types
Choose the data types relevant to your analysis by highlighting the options you wish to download.
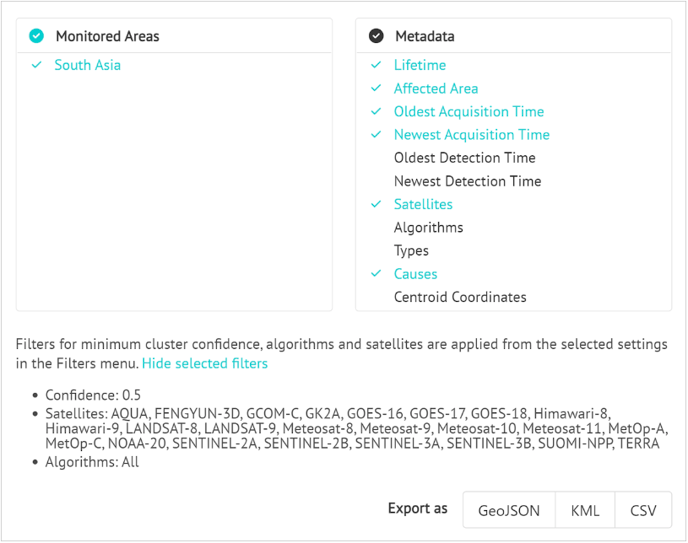
Filters for Cluster Confidence, Satellites, and Algorithms are automatically applied from the current settings in the “Filter” menu. Adjust any filter settings there if needed. Image below for reference.

5. Download Data in Desired Format
Select from GeoJSON, KML, or CSV formats for download. Click the desired format to start the download.

Conclusion
Downloading monitored area data is a straightforward way to keep track of wildfire activities and trends in your area of interest. Make sure to use the Export Data menu to fine-tune your data selection and get the format best suited to your needs.